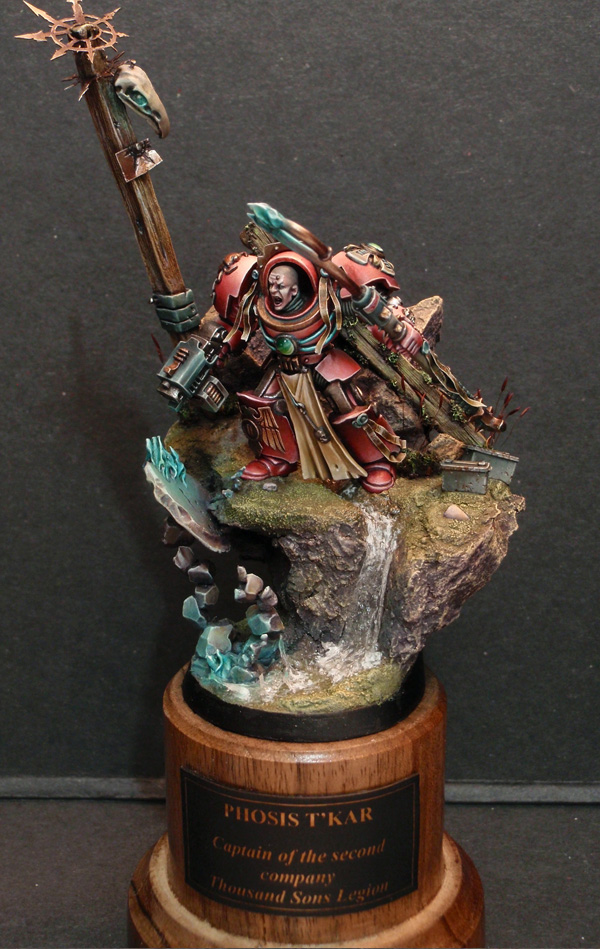
A BASE IS GOOD … but a working base is better!
Making the base for your model is usually something you do once you finished the model. Very often, the idea for the base is something you come up with afterwords. Because of this, spending time on the base can be daunting for most of us. However, the base is crucial and I think if you approach it differently, it can even be fun.
The base is the basis
It’s no secret, I’m a eternal fan of Games Workshop. I consider myself a child of GW. As a result, I am highly interested in all that I can read about their universes. Recently, a great novel called «A Thousand Sons» published by the Black Library, caught my attention. It had it all, charismatic characters, secrets revealed (or invented for the occasion,) and above all, pre-heresy Thousand Sons totally manipulated by Tzeentch. If there’s one thing I love about the gods of chaos, it is Tzeentch and all his shenanigans. In short, a legion that I love, a god that fascinates me, a good book: it did not take much to inspire me to take on this painting project.
I took the opportunity to focus my attention on one of the main characters. He is named Phosis T’Kar, and has mastered telekinesis and all matters pertaining thereto. Immediately, I got the idea to make him in the process of casting a spell, and due to the energy being released, have lots of objects levitating in the scene. The idea was ready, now I only had to go to work!
To Begin
I begin by deciding overall what the size would be. I wanted to give this model a raised base so it would be easier to show the levitation in action.

I used plastic card to get an edge and a smooth junction at the back of the base.

Once set up, I sculpt the rock formation with the first two pieces that would affix the whole thing to the base proper.

Then I built the formation up until it got to the height I wanted. For this I positioned the figre on the base during opération to find the right size. The photo below is a simple test of size and position. Nothing stuck, nothing is remains to be done.

I Believe I Can Fly
The goal is to make a rock mass levitate. My character was in the process of willing all thèse objects to flight. To make the pièces of rock, I used a pieces of Milliput, which I rolled out and then cut and glued together so that there is a minimum of contact zones between them.


You can see the effect I’m going for with the loose rock here, still in progress of course. The passing river I am also going to float, which will help in communicating the levitation going on. I believe that no matter the scope of the project there is no reason to skimp on the effects.
Extra Touches
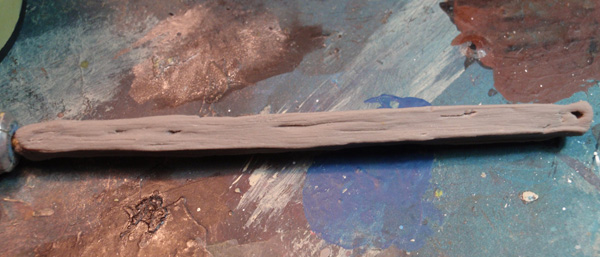
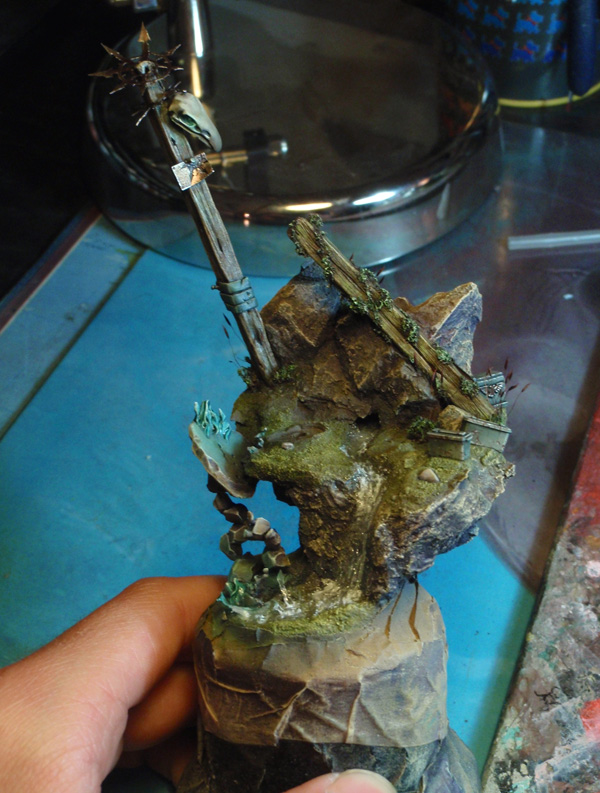
To improve the base, I decided to add a wooden beam. I built it in four stages. First, on a brass rod I messed up previously, I apply Brown Stuff to form a good solid connection with the rod.

Second, I stick Sculpey Firm on the Brown Stuff, and shape it roughly in to a rectangular shape.

Third, with the back end of a brush, I start first by forming bumps and grooves around the structure. Then, I brush with a medium stiffnes bristle brush, I brush the clay, remember, always in the same direction to make the texture of wood completely crédible. It only took a few minutes.


Fourth, I end up forming notches, holes, and knots in wood. Then I go in the oven thirty minutes at 270° F (130°C). All that’s left is to glue it to the rocks.
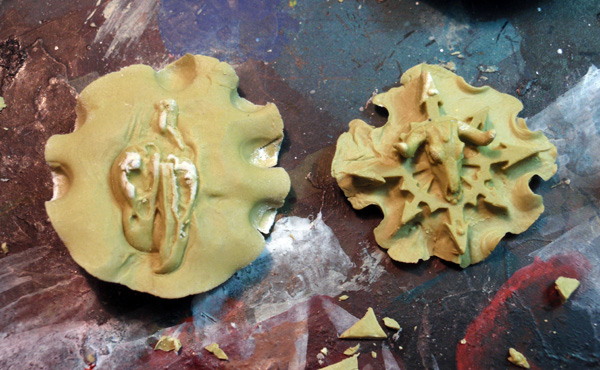
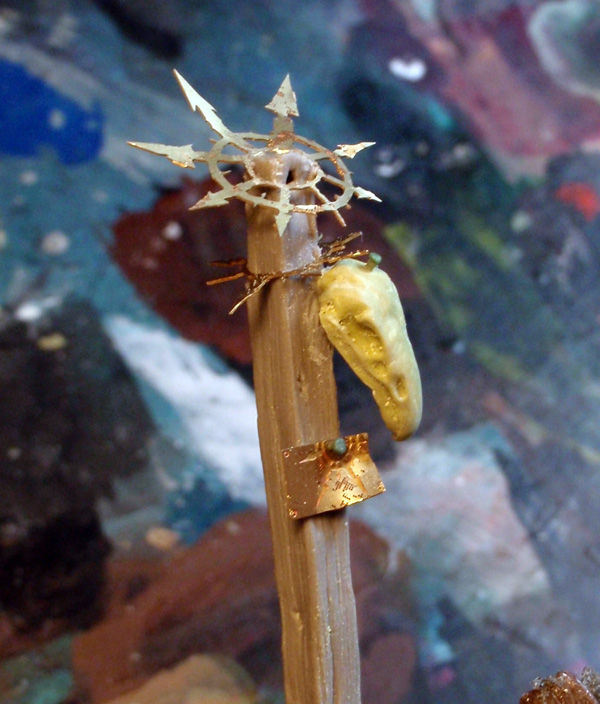
I also made up some accessories that nod to the FW Lord of Change and to the destiny of the Thousand Sons.
I begin to lay the foundation of the rock and fill the space with foam board.
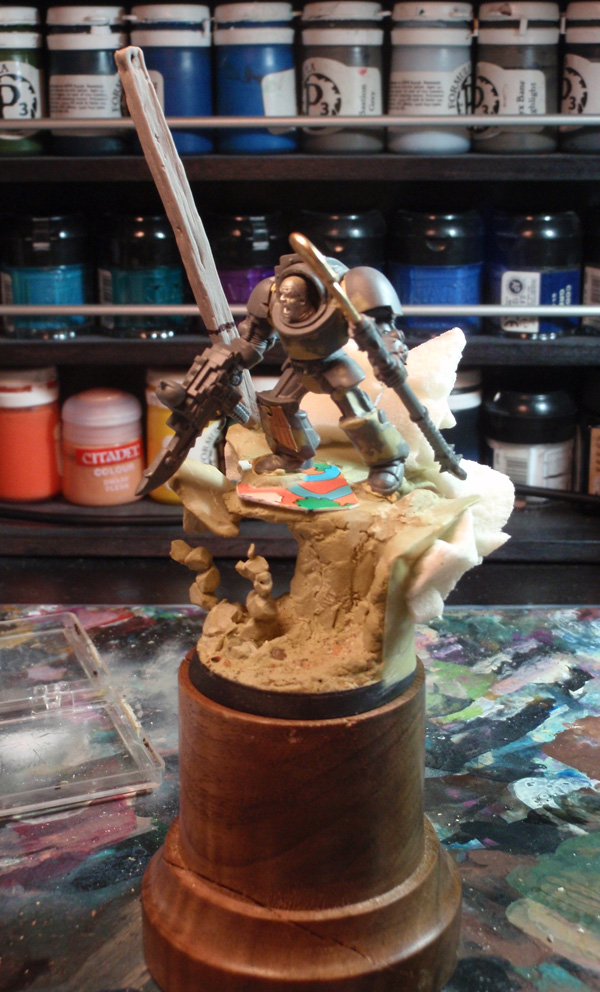
Then comes a technique approved and tested: Fimo / Milliput rock formations.
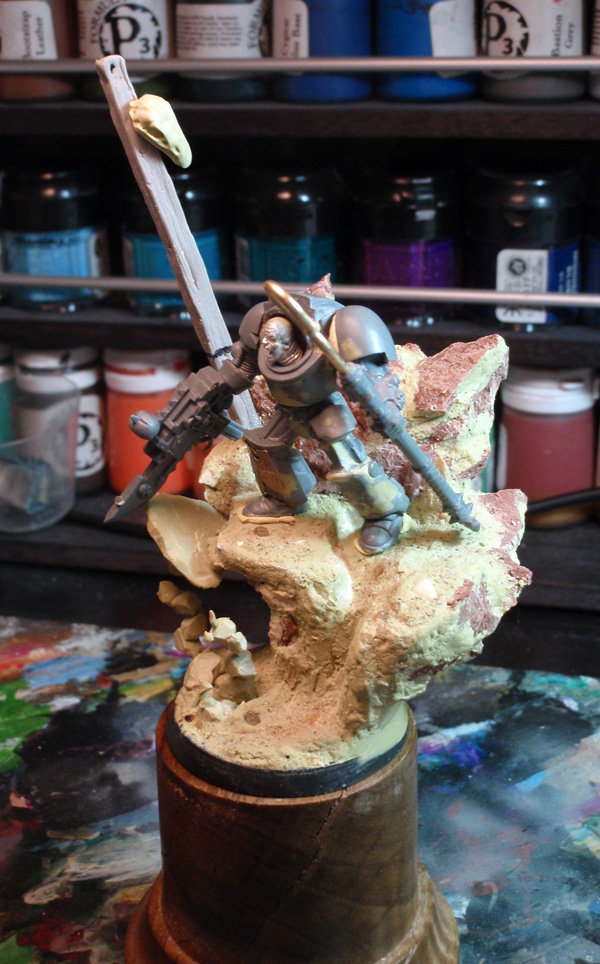
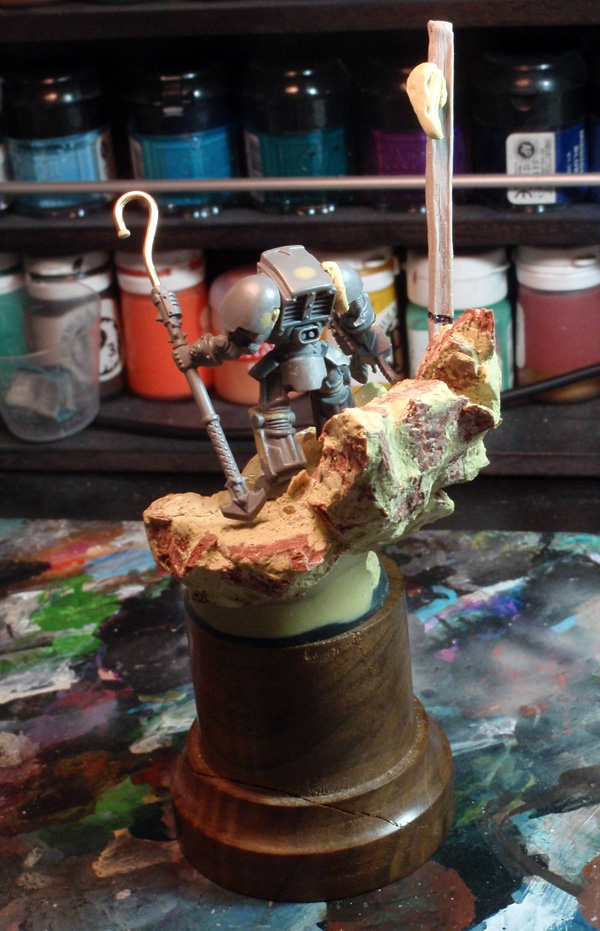
Practical and fast, this technique allows me to make the rock base I want. Beware though, this technique is good for smooth shapes and does not hold hard lines well.
Then I add the finishing touches. First I add the flames, both on the ground and on the back and of his staff.


Then I add the symbol of chaos and the vulture skull, which I attach to the pole.
On to the Paint
I start by painting my base. The rock gets a purplish hue while the ground gets some green. This color is chosen to be a good contrasting color to the red of our Terminator armor.
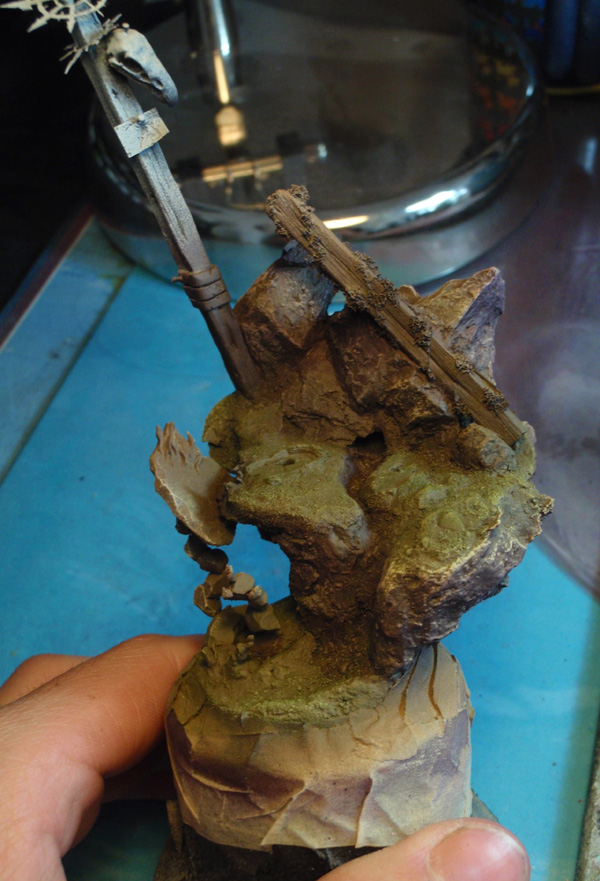
I brush the rock and soil with a «creamy yellow» to bring some richness to the color. Then, I come back with water to soften it. Finally, I paint the flames with an ethereal blue/green, using a mix of GW turquoise, Scaly Green and turquoise ink. This color is also added to the staff. I avoid using too many différent colors and instead use colors to play well with our primary few.
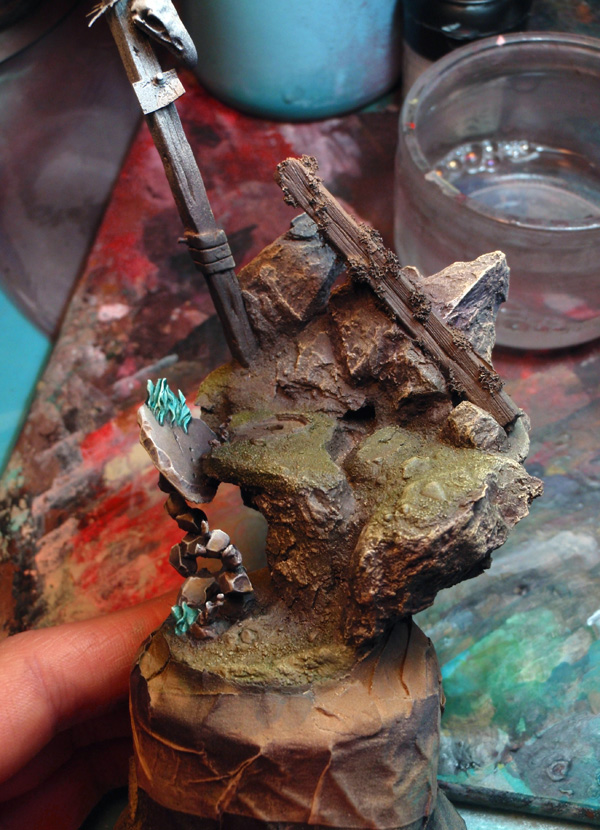
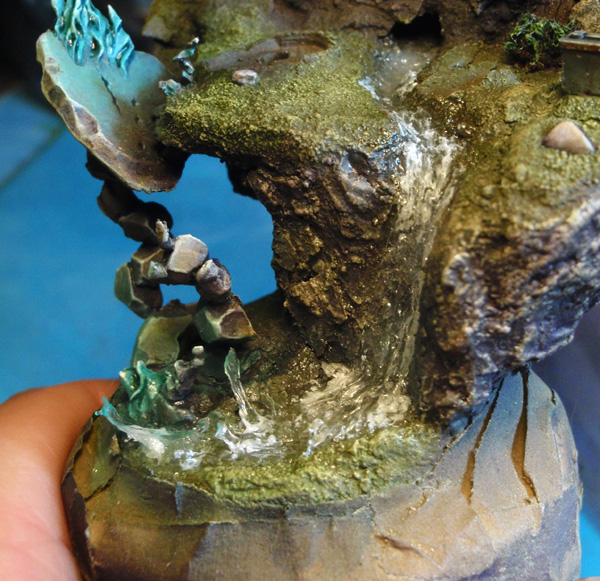
I also start running the water. I use Gloss Super Heavy Gel from the Liquitex range. This gel is easy to work with a simple spreading tool and dries relatively quickly as long as you keep it 1 or 2mm thick. More than that and the drying time could reach up to a full day. Completely transparent, it can be clouded with ink or acrylic without any problem.I turn to the waterfall.
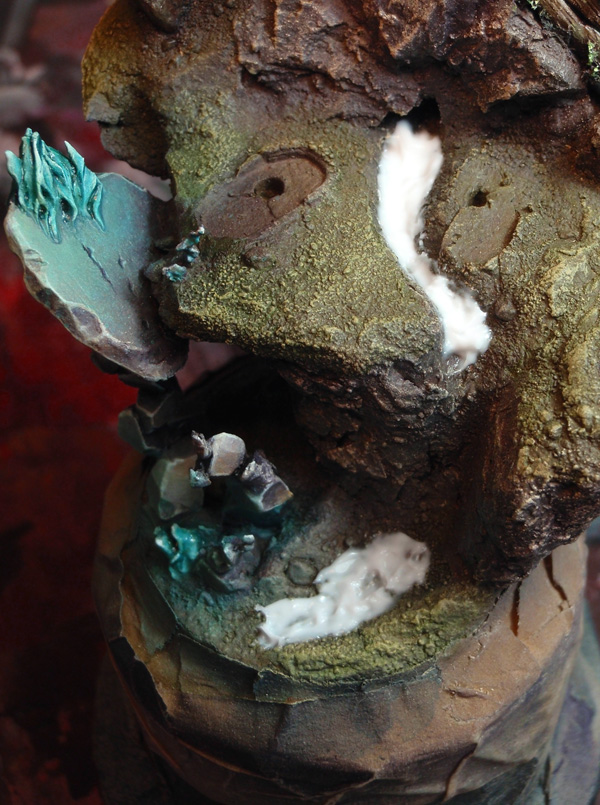
This is actually just a piece of plastic cut to the desired shape and brushed with Liquitex gel.
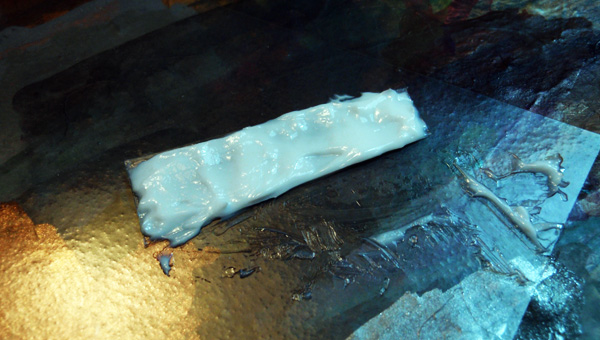
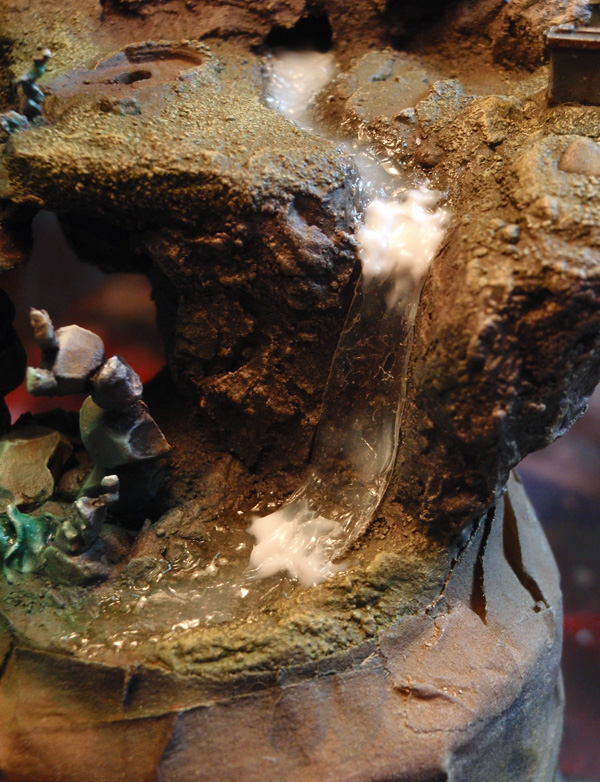
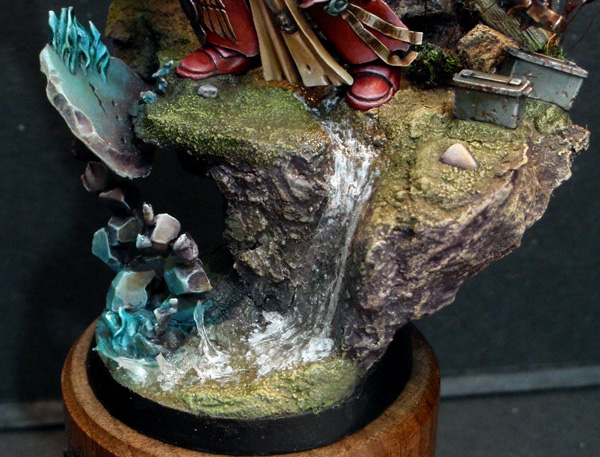
Finally, with a little gel mixed with a very, very slight hint of white, and Liquitex Resin sand, which is used to make foam and ripples in my water. In addition, parts of the water, wich are suffering the effects on the lévitation, are given a tint with the turquoise ink and white. In this way, I bring all these elements together visually with the color selection to unify the image. I ended up adding some light vegetation in order to justify the presence of moss on the second wooden beam.
The End
A picture is worth more than a thousand words, so here is a simple photo of the finished piece. Fromm y perspective, I always prefer to see a beautiful figure on a base, with at least as much attention as the character itself got, rather than a beautiful figurine on a base of simple rock without any real story or life. Not even getting in to the topic of tastes and color selection. However, if this article pushes you to try new things in terms of bases, then my work here is done!
And if you want to see more pictures of Phosis T’Kar, you can simply click here !


